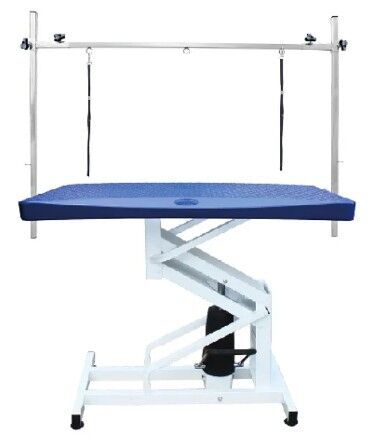
The Clipper Shop Standard Plastic Table Top
The Clipper Shop Standard Plastic Table Top
Upgrade your grooming station with this durable, skid-resistant plastic table top. Constructed from heavy-duty polyethylene, it provides a robust, slip-resistant surface for safe animal grooming while remaining lightweight and strong. The heat-resistant material withstands regular pet dryer use without warping.
Designed as a direct replacement for your existing table top, installation is straightforward with basic tools. It is compatible with select grooming table models, ensuring a secure fit for professional use.
Key Features
| Brand | The Clipper Shop |
| Material | Polyethylene |
| Overall Length | 43.3 in |
| Overall Width | 23.6 in |
| Overall Height | 2.4 in |
| Weight | 16.5 lbs |
| Surface Type | Skid-resistant, textured |
| Compatible With | The Clipper Shop Professional Electric Grooming Table (Hand Control and Foot Control), Hydraulic Grooming Table, Height Adjustable Table Large |
Highlights
- Skid-resistant surface for secure grooming
- Durable heavy-duty polyethylene construction
- Heat-resistant design withstands pet dryer use
- Lightweight yet robust for everyday use
Materials & care
Wipe clean with a damp cloth and mild soap. Avoid using abrasive cleaners or solvents that may damage the surface. Not dishwasher safe.
Compatibility
Professional Electric Pet Grooming Table with Hand Control
Professional Electric Pet Grooming Table with Foot Controls - NEW Style
Grooming Table Hydraulic
Quality Pet Grooming Height Adjustable Table Large
How to use
Installation Instructions:
CAUTION: If using a drill to perform the following steps, be careful not to apply too much torque to avoid stripping the holes. It is recommended to use a hand screwdriver.
Step 1: Remove the screws which fasten the existing table top to the table frame. These screws are found on the underside of the table frame and are located within the hole openings.
Step 2: Remove the existing table top.
Step 3: Position the new plastic table top evenly on the table frame.
Step 4: With the new table top in place, mark the location where pilot holes are needed using the holes in the table frame as a reference.
Step 5: Remove the new table top and place it upside down on a flat non-abrasive surface. Drill pilot holes in the positions as marked in the previous step.
Step 6: Place the table top back on the table frame and align the pilot holes with the holes in the table frame.
Step 7: Using the screws from Step 1, fix the new table top to the table frame.
Frequently asked questions
|
Product features
Product features
Materials and care
Materials and care
Merchandising tips
Merchandising tips
Share